
| 「How to change the Sear and Hammer...」 This page explains "Disassembly Process" about Maruzen APS-3. We make Sear and Hammer for APS-3. If you want to change them for PDI upgrade parts and you don't know about APS-3, please see this page. |
 |
|---|---|
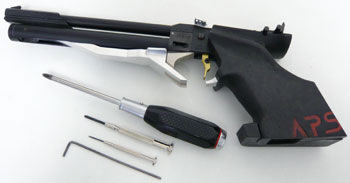 |
Tool for Disassembly Process... ・APS-3 ・Minus Driver and Plus Driver ・Hexagon Wrench You can start to dismount parts easily with them. Please read below sentence about "Disassembly Process" and prepare what you need. |
<Menu>
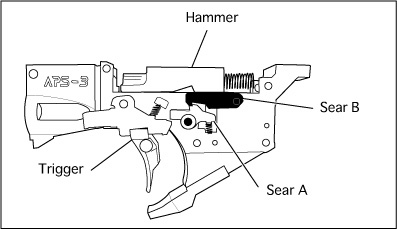
・Cross-section view ... |
|
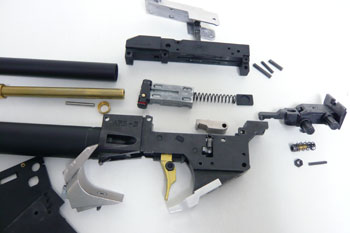
| ・APS-3 Disassembly Process ... Please read before starting disassembly. |
|
・Screws and Pins ... |
|
| ・PDI Sear(Sear B / in Cross-section view) | ・PDI Hammer |
| ・PDI Sear A(Sear A / in Cross-section view) | |
 |
|
|---|
The parts name is same as "INSTRUCTION MANUAL" with APS-3.
*Please NOTE;
APS-3 has a lot of screws and pins.Don't lose them.(The list of Screws and Pins is HERE.)
 |
 |
 |
|---|---|---|
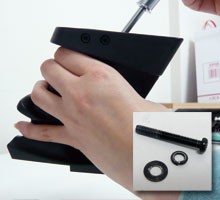
| 1:Dismount the Front sight base. This Pict is 1st. lot. It has small screw under the Front sight base. |
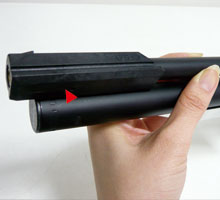
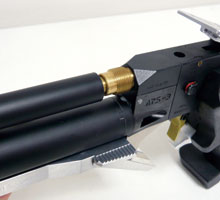
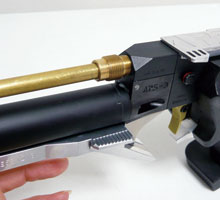
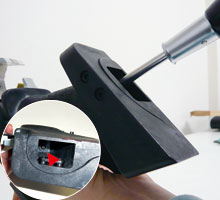
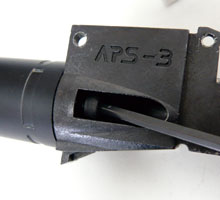
2:Dismount the Outer barrel. | 3:Screw and dismount Barrel block.It may be fixed too tight.If so, please use nipper with rubber or cloth. |
 |
 |
|
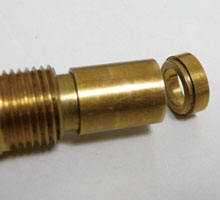
| 4:Sometimes the Barrel Ring is still in Chamber.Please get it out with tweezers. | 5:Dismount the Grip. | Point! Leave the screw in the Grip to put it easy. |

|
|
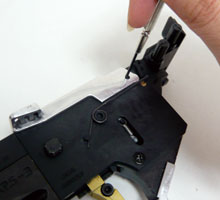 |
| 6:Dismount Rear sight's screw. You can do it at the same time NO.12. |
7:Dismount Trigger Guard(front) | 8:Push the pin out from Upper Cover. |
 |
 |
|
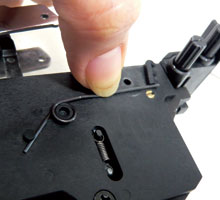
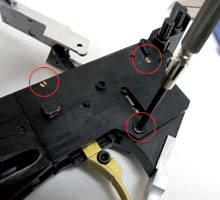
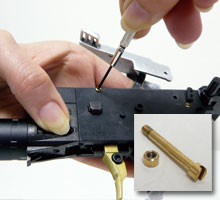
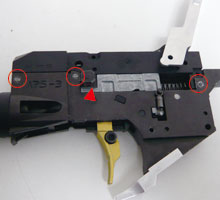
| 9:Dismount the wire spring. | 10:Get 3 screws out from Trigger BOX. | Point! Minus screw has small parts.Don't lose it. |
 |
 |
 |
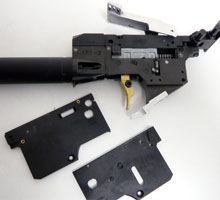
| 11:Dismount covers(two sides) | 12:Dismount the Rear Sight. You can do No.6 at the same time. | 13:The Chamber is fixed by 3 pins. They has different diameter and diameter. |
 |
 |
 |
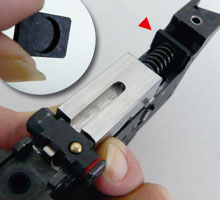
| Point! We recommend that you remove the Comprest Cylinder with Hexagon Wrench after dismount Chamber. |
14:Dismount the Chamber with folding Hammer. |
15:Dismount the Hammer. |
 |
 |
 |
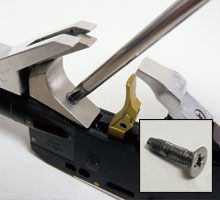
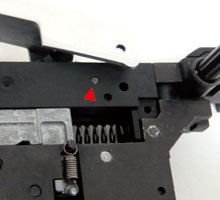
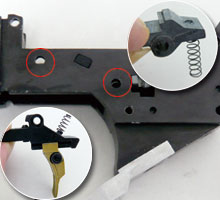
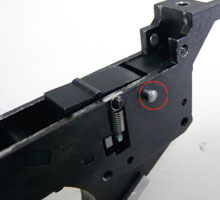
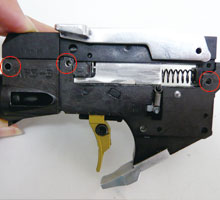
| 16:Push out the pin and dismount the Sear.(Sear B in Cross-section view) | 17:You can dismount Sear A and Trigger after pushing out 2 pins(Red circle) | Point! Trigger and Sear B have Spring. Trigger BOX has pockets for the Springs. |
| Completed. | ||
| You can build in PDI Hammer and Sear after above all process. After set Sear and Hammer in, put Chamber and other parts back adversely. Please NOTE; *Please pay attention for the position of Upper cover when set the Chamber.If the posirion is wrong, you cannot set the Rear Sight later. *Pins have different lenght and diameter.Please see HERE. |
||


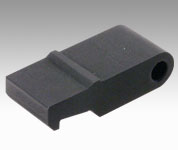 |
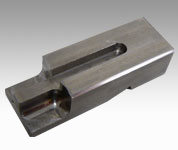
Sear Made of S45C.It is hight durability. Sale \2,030 We deem to get your agreement for the below policy when you place an order. |
|
|---|---|---|
 |
 |
 |
|---|---|---|
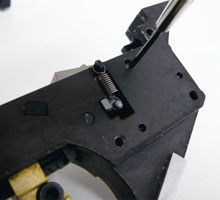
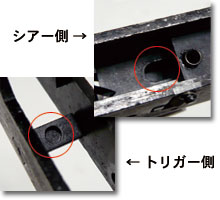
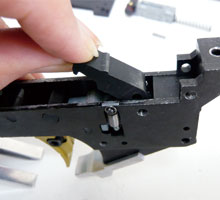
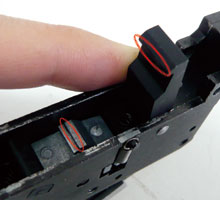
| 1:Set the PDI Sear in the BOX. | 2:Insert the Pin.(Red circle) | Point! You can get more smooth trigger feeling if you scrub the PDI Sear (Point of Red circle) delicately. |
| IF you don't know disassembly process about APS-3, please see the " APS-3 Disassembly Process ". After set Sear and Hammer, put it back adversely. |
||
 |
Hammer Made of SUS303. Sale \ Not yet... We deem to get your agreement for the below policy when you place an order. |
|---|---|
| The Hammer in the picture,it is production prototype. |
 |
 |
|
|---|---|---|
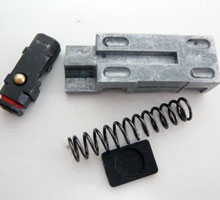
| 1:Set the Hammer,Safty,Spring into BOX. (The Safty has the direction. ) | 2:Please pay attention for the position of Upper cover when set the Chamber.If the posirion is wrong, you cannot set the Rear Sight later.After that, fix with 3 pins(Red circle). |
The Hammer in the picture,it is production prototype. |
| IF you don't know disassembly process about APS-3, please see the " APS-3 Disassembly Process ". After set Sear and Hammer, put it back adversely. |
||